How to measure knitting gauge
To measure knitting gauge, knit a swatch at least 15 cm or 6 in square in your pattern stitch, block it, then count the stitches and rows over 10 cm or 4 in through the middle of the fabric. That count, stitches and rows per 10 cm, is your gauge, and it is the number every cast-on and length in the pattern depends on.
What gauge is
Gauge is how many stitches and rows your yarn, needles, and hands produce over a set width and height. The standard reference length is 10 cm or 4 in. It is measured in the actual pattern stitch, not always stockinette, because a cable or a lace panel knits to a different width than plain knitting. And it is measured after blocking, because blocking is what the finished garment goes through.
The Craft Yarn Council standard measures gauge over a 4 in by 4 in (10 cm by 10 cm) square. Every yarn weight on the council's chart lists its typical stitches and rows over that 4 in, which is why patterns and ball bands quote gauge the same way.
Source: Craft Yarn Council, Standard Yarn Weight System (craftyarncouncil.com).Step 1: knit a generous swatch
Make it at least 15 cm or 6 in square, larger than the 10 cm you will measure. The extra fabric keeps your ruler away from the curling, distorted edges. Work it on the needles and in the stitch pattern you will use for the project. A swatch knit flat when the garment is worked in the round can read differently, so match the method when it matters.
Step 2: block it the way you will block the garment
Wash or wet-block the swatch and let it dry flat, exactly as you plan to treat the finished piece. Stitches relax and settle, and many yarns grow or tighten in the process. Measuring an unblocked swatch gives a gauge you will never knit to. This single step prevents a lot of finished garments that come out the wrong size.
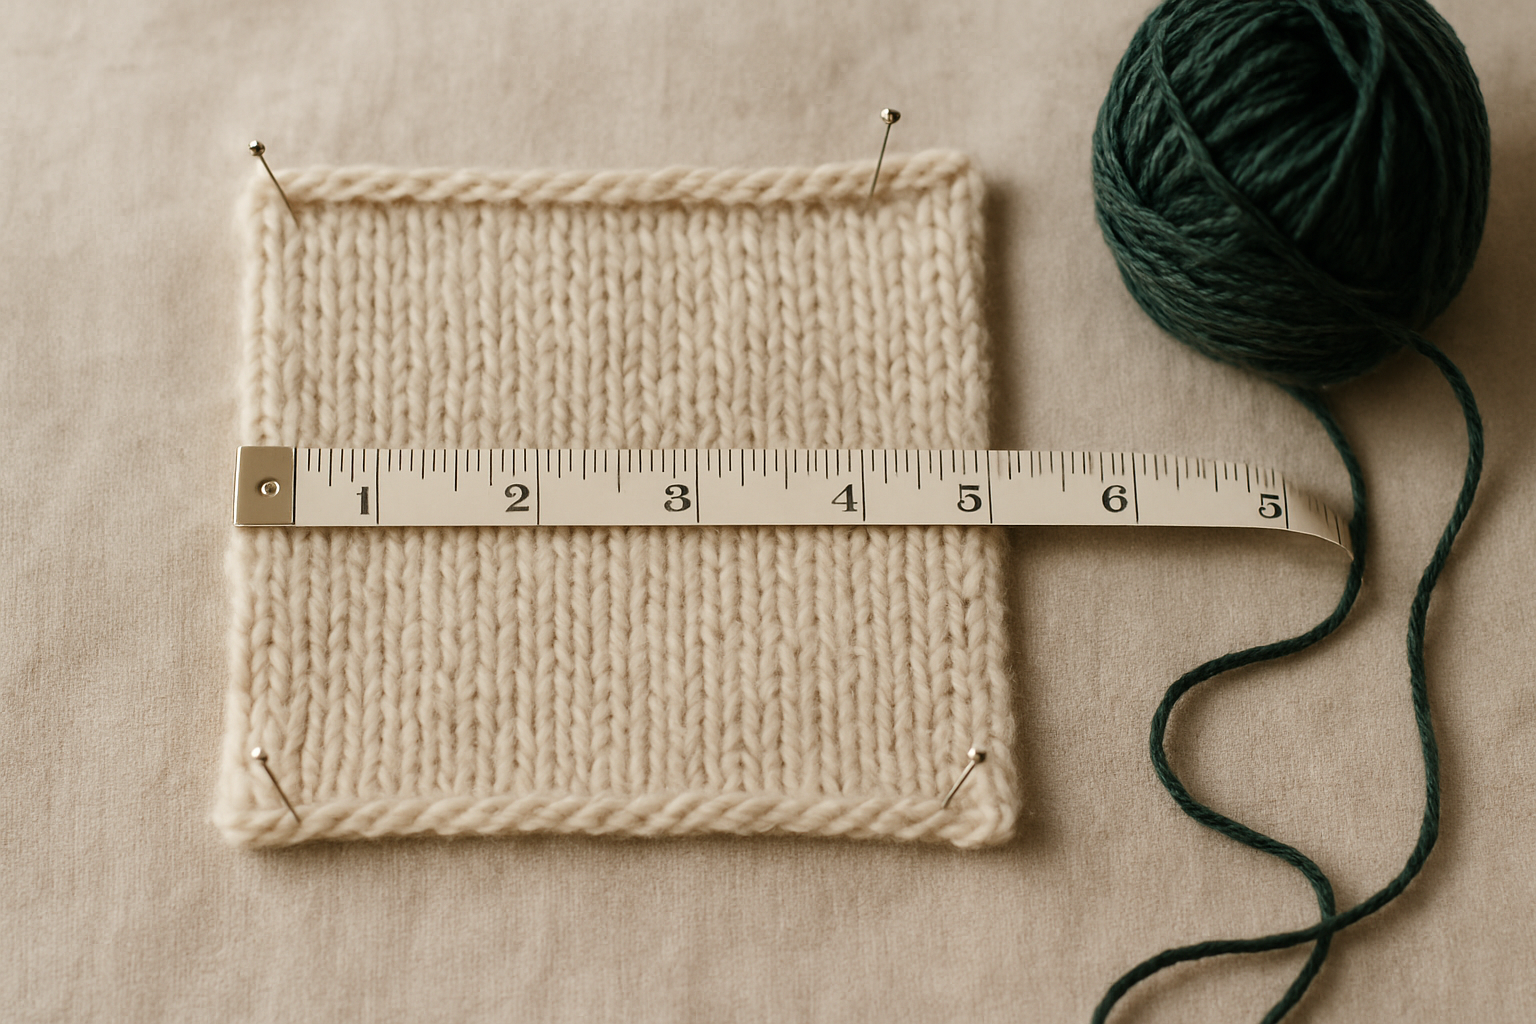
Step 3: count across the middle
Lay the blocked swatch flat without stretching it. Place a ruler or a gauge window across the centre and count the stitches over 10 cm or 4 in, including any partial stitch at the end. Then count the rows over the same length. Take a couple of readings in different spots and average them. Never measure at the edges, where the stitches pull in and lie about their width. See gauge swatch mistakes for the errors that quietly skew this count.
Reading a gauge that is quoted over 4 in
Patterns and ball bands often give gauge as a number over 4 in rather than per single inch, because 4 in (10 cm) is the standard window and short measurements magnify error. If a pattern says 18 stitches and 24 rows over 4 in, measure across a full 4 in or 10 cm, not one inch times four. A single inch can land mid-stitch and round badly, while the wider window averages the fabric out. When you compare your swatch to a pattern, match the units exactly: 4 in to 4 in, or 10 cm to 10 cm.
Why both stitch and row gauge matter
Stitch gauge sets width, so it drives your cast-on numbers and matters most. Row gauge sets length and the spacing of shaping. If row gauge is off, the body comes out too long or short, the armhole depth drifts, and the sleeve increases land in the wrong place. Record both numbers and use both.
Why one stitch off matters so much
Gauge error does not stay small. It multiplies across every stitch in the garment. Imagine your gauge reads 20 stitches per 10 cm but you are actually getting 21. On a 100 cm chest, the pattern casts on for 20 per 10 cm, so 200 stitches, but at your true gauge those 200 stitches measure only about 95 cm. That is 5 cm lost, often the gap between one size and the next. One stitch on the ruler becomes a full size on the body.
Once your gauge is solid, the rest is arithmetic. Drop your numbers into the knitting calculator to turn gauge and a measurement into stitches and rows. Grading a whole pattern across sizes? The free pattern grading generator uses your gauge to compute every size with even shaping. And when you are ready to size up a single pattern by hand, read how to grade a knitting pattern.
Sources
- Craft Yarn Council, Standard Yarn Weight System and gauge guidelines (craftyarncouncil.com).
- TECHknitting, on swatching, blocking, and reading gauge accurately (techknitting.blogspot.com).
- Ann Budd, The Knitter's Handy Book of Patterns, Interweave: gauge as the basis of every count.
- Interweave knitting reference, on swatch size and measuring practice.
Frequently asked questions
How do you measure knitting gauge?
Knit a swatch at least 15 cm or 6 in square in your pattern stitch, block it the way you will block the garment, then lay it flat and count the stitches across 10 cm or 4 in through the middle, away from the edges. Count the rows over the same length. That is your gauge.
Why measure gauge after blocking?
Blocking relaxes and resets the stitches, and the fabric can grow or tighten noticeably. The garment lives its life blocked, so the blocked number is the real one. Measuring before blocking gives you a count you will never actually knit to.
Do I need to match both stitch and row gauge?
Stitch gauge sets the width and matters most, since it decides cast-on counts. Row gauge sets the length and the spacing of shaping. If your row gauge is off, body length, armhole depth, and sleeve shaping drift, so it is worth checking both.
How much does being off by one stitch matter?
A lot, because the error multiplies. One extra stitch per 10 cm on a 100 cm chest is 10 extra stitches around, which can be 5 cm of unwanted width, close to a full size. Small gauge differences become large fit differences across a garment.
Why measure across the middle and not the edges?
Swatch edges curl, pull in, and distort, especially in stockinette. The stitches there are not at their true width. Measuring through the centre, over several stitches, gives a count that reflects the fabric you will actually knit.